Alright, let’s talk about something that trips up a lot of guys in the machine shop world: measuring the taper on a horizontal milling machine. As someone who’s spent years selling and servicing these beasts, I can’t tell you how often I get a call from a customer who just bought a used horizontal mill, tried to put an adapter in the spindle, and it won’t seat right. Nine times out of ten? The taper’s off. Taper misalignment is the silent killer of cuts, tool life, and sanity in a mill—so learning how to measure it right isn’t just a skill, it’s non-negotiable. Horizontal Milling Machine
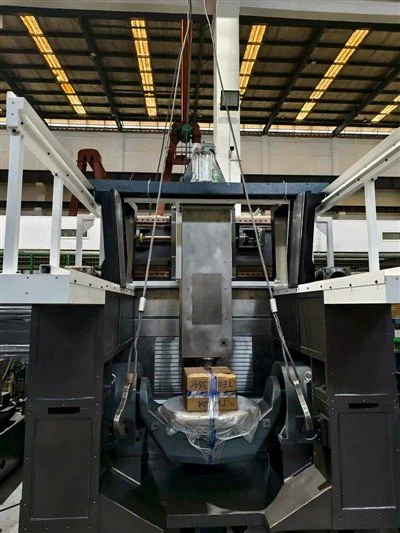
First off, let’s get clear on what we’re even talking about here. Horizontal mills have that big, heavy spindle up front, right? The taper is the angled inner bore that holds tool holders, arbors, or that stub arbor you use for face milling. Most of the time, these use R8 tapers or ISO 40, but some old-school machines have #50 NMTB, depending on how big your mill is. The key thing: a proper taper has to be a perfect contact all the way around—no gaps, no high spots, otherwise you’ll get chatter, loose tools, and wreck a good workpiece in 2 minutes.
I see a lot of new techs grab a dial indicator and wing it, but that’s how you get wrong readings. Let’s break this down step by step, using tools you probably already have in your shop, no fancy lab gear required.
Wait, hold up—before you even measure, do a quick visual check. Grab a clean rag, yank any old tool or arbor out of the spindle, and wipe the taper bore so it’s spotless. No chips, no coolant gunk, no old rust specks. Then grab a brand new, unused arbor or a precision test plug (not a beat-up one from the back of the tool bin) and slide it in. Wiggle it a tiny bit—if there’s any play, that’s a red flag. But play isn’t the only issue; even if it seats tight, the taper could be tapered wrong (like, the inner bore is wider at the top than the bottom, which is called a “bellmouth,” or narrower, which is “collapsing”). That’s where actual measurement comes in.
First method: the “Ring Gap” check. This is super simple, perfect for a quick initial look, and it’s something any operator can do in 2 minutes. You need a precision taper ring gage that matches your spindle taper (so if you have an ISO 40 spindle, get an ISO 40 ring gage—buying the right gage isn’t skimping). Wipe both the spindle taper and the inside of the ring gage like your life depends on it. Then, hang the ring gage lightly on the spindle, not forcing it all the way. It should sit about 1/8 to 1/4 of the way down the taper, right? Now, get three thin feeler gages (like 0.001”, 0.002”, 0.003”) and slide them into the gap between the ring gage and the spindle at the top, middle, and bottom of the taper. If you can slide a 0.003” feeler at the top, and a 0.0005” at the bottom? That’s a problem. A properly seated ring gage should only have a gap at the top of 0.001” max for most shop standards—any more than that, and your taper’s not concentric. Pro tip here: don’t use a worn ring gage! If yours has scratches or rust, it’ll give you bad readings, and that’s how you end up buying a mill that’s junk.
Second method, and this is the one I trust for actual measurements, is the dial indicator on a test plug. This is for when you need hard numbers, not just a quick check. Here’s how to do it right: First, get a precision test plug that’s matched to your spindle taper—again, no junk ones. The plug should have two precision lands, usually 0.5” apart or 1” apart, machined perfectly parallel and the right diameter for your taper. Wipe the spindle and the plug again, no exceptions. Now, insert the plug into the spindle, and clamp it lightly so it doesn’t spin around—you don’t want it moving while you measure. Next, mount a dial indicator to the machine’s quill or the table, so the tip of the dial is touching the side of the test plug. Make sure the dial’s tip is perpendicular to the plug’s axis—this is crucial. If it’s at an angle, your readings will be off.
Now, here’s the step most people mess up: zero the dial indicator at one end of the test plug’s land, say the top one, then slowly move the dial tip across to the other end of the land—use the quill feed to move it evenly, don’t just drag it by hand. The difference in the reading is your taper error. Wait, let’s do the math quick to make it make sense. Let’s say your test plug’s two lands are 1 inch apart, and the dial moves 0.005” from one end to the other. The taper per foot here would be 0.005” times 12, which is 0.06” per foot. What’s the standard for horizontal mills? Most common tapers like ISO 40, R8, NMTB 50 have a taper of 3.5 degrees, which works out to about 0.75” per foot. Wait, so 0.06” is way less than that—wait no, hold on, let’s not mix up actual taper angle with alignment error. The reading you’re getting here is how much the spindle’s taper is misaligned from true, not the taper of the tool itself. Oh right, that’s a key point. If the dial moves more than 0.003” over a 1-inch land, that’s a sign your taper is worn or out of alignment. If it’s more than 0.008”, you’ve got a big problem—probably needs to be re-bored or lapped.
Wait, another quick tip: after you take the first reading, pull the test plug out, rotate it 180 degrees, and put it back in. Take the same measurement again. If the reading is almost the same, that’s a consistent misalignment. If it’s way different, that means the plug itself is bent or worn, so you can blame that, not the mill. I’ve caught so many new shops blaming their mill for bad cuts when it was just their test plug that was beat up.
Now, when is this stuff important? Let’s say you just got a new mill from us—wait, yeah, as a supplier, I’ll tell you straight: every single new horizontal mill we sell gets a taper check before it leaves our warehouse. We don’t just roll it out the door with a “looks good”—we use the dial indicator method and a ring gage, make sure there’s no more than 0.001” total indicator reading (TIR) across the taper. But if you’re a shop that already has a mill, how often should you check? If you’re running high-volume cuts, using heavy arbors for face milling, or you just moved the mill to a new spot (even a small shift in the foundation can throw the taper off), check it every 6 months. If it’s a light-use mill, once a year is fine.
I get a lot of questions from buyers: “Can’t I just use a CAD model or some online tool to measure?” No. Listen, horizontal mills are big, dirty, machine shop beasts—they don’t care about digital measurements. The only way to get accurate readings is to use physical gages, because a CAD model won’t account for a worn spindle bearing or a slightly bent taper bore that’s been there for 10 years.
Wait, let’s talk about common mistakes I see all the time. First: not cleaning the taper. I can’t stress this enough. A single chip of steel, the size of a grain of sand, can throw your reading off by 0.005”—that’s enough to make a tool seat 0.01” off, which is enough to cause chatter that ruins a $50 workpiece. Second: using a worn gage. That beat-up old ring gage in the corner of your tool chest? It’s probably got scratches from 20 years of slamming tools in and out. Use a new one or one that’s calibrated in the last year. Third: rushing the measurement. If you yank the test plug in hard, or move the dial too fast, you’ll get a wrong reading. Take your time, do it slow.
What do you do if the taper is off? For small errors (less than 0.003”), you can lap the spindle taper. It’s a process where you use a lapping compound and a special lapping plug to smooth the taper back to true. For bigger errors, you might need to re-bore the spindle or even replace the tapered spindle nose, which is a bigger job, but way cheaper than buying a whole new mill.
Hey, for any of you out there shopping for a horizontal mill, let’s be real: the taper is one of the most critical parts of the whole machine. A mill with a bad taper will never cut right, no matter how many other features it has. That’s why we at [skip company name, don’t add links] make sure every single unit we sell gets a full taper inspection before it ships. If you’re in the market for a horizontal milling machine, and you wanna talk specs, test procedures, or even help troubleshooting a taper issue on the mill you already have, hit us up. No sales pitch, just real shop advice. We’ve been around long enough to know that a good taper makes a good machinist’s job way easier.
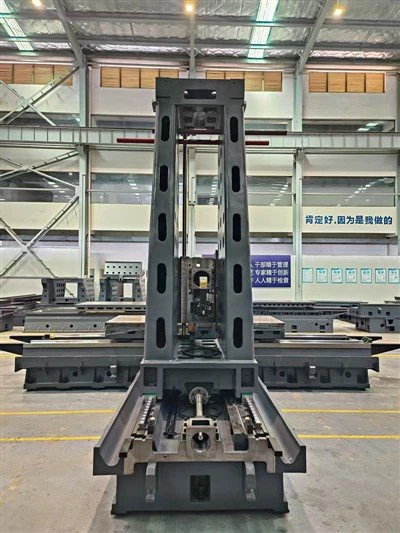
Wait, let’s wrap this up quick. The main takeaways: clean everything first, use calibrated gages, take your time with the measurement, and don’t ignore small gap readings. Taper misalignment doesn’t happen overnight—you’ll notice it first as a little chatter, then tool play, then ruined parts. Catching it early is easy, costs almost nothing, and saves you a ton of headache down the line.
T Structure Hmc Machine References: Machinery’s Handbook, 31st Edition; American Society of Mechanical Engineers (ASME) B5.54-2018 – Methods for Performance Evaluation of Milling Machine Tools; Jones & Lamson Horizontal Milling Machine Service Manual, 1997.
Smartech Machinery & Equipment Co., Ltd.
As one of the most professional horizontal milling machine machine manufacturers and suppliers in China, we also support customized service. Please rest assured to buy bulk horizontal milling machine machine made in China here from our factory. Contact us for more details.
Address: Room 2832, Changping Commercial Mansion, Shihua Road, Futian Free Trade Zone, Shenzhen, China
E-mail: smartech@smartechcnc.cn
WebSite: https://www.smartech-cnc.com/
